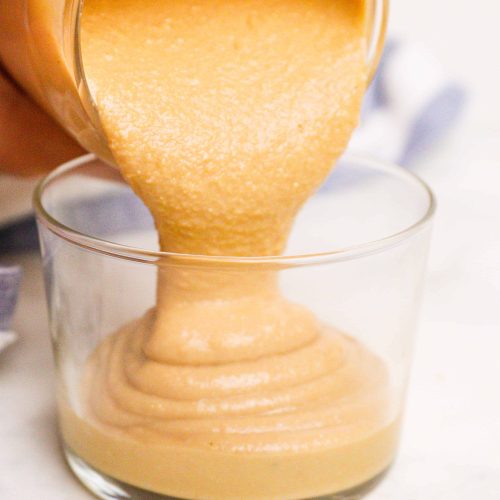
Ever thought about making your own Delicious Homemade Peanut Butter? It’s the perfect way to satisfy those nutty cravings without having to settle for the unhealthy, store-bought stuff!

So, we’re diving into homemade peanut butter territory. The delicious smell of fresh peanuts roasting, the hum of the blender as it does its magic, and the irresistible suspense of that first nutty mouthful. It’s the ultimate sensory adventure, a total DIY foodie experience that’ll make your heart race with pure joy.
But dont stress its much easier than you’d think. I will list out the ingredients, the steps, and some handy tips to make sure your peanut butter turns out creamy and yummy, just like you love it.
Why You Should Make This Recipe
- When you make your own peanut butter, you leave out all the preservatives and sweeteners that tiy have in the stuff you’d find at the grocery store.
- While you leave out that bad stuff, you keep in the good stuff. The vitamins, minerals, and nutrients you have in nuts are still here in this butter.
- There are numerous types of peanut butter (e.g., smooth, crunchy, salty, etc). By making your own, you can make it as smooth, creamy, crunchy, and salty as you like.
- And one additional benefit, Mother Nature will thank you for skipping the unnecessary store-bought jar wrapping.
Is This Homemade Peanut Butter Keto Friendly?
Yes, it’s keto friendly. Peanuts are relatively high in fat and low in carbs, which means a butter with only this ingredient (i.e., without sugars, additives, or preservatives) can be a part of a keto diet. Peanuts contain about 14 grams of fat per 28-gram serving and about 6 grams of carbs, so should be ok for keto.
Ingredients
- 4 cups roasted peanuts
- ¼ tsp salt

Instructions
- Pour the peanuts and the salt into the blender.
- Process the peanuts so that they make a fine crumb. Scrape down the sides of the blender to clear off any peanuts so that the butter is consistently smooth.
- Keep blending and scraping until you have a smooth peanut butter.
Variations
- Play with flavors: Add some spice to the peanut butter. Cinnamon is delicious and keto friendly. I also like to add cocoa powder or vanilla extract.
- Change the nuts: You can follow the same steps and use almonds, macadamia, or cashew nuts instead of peanuts. All of these are keto friendly, though you’ll want to watch the portion sizes of the cashew butter, as it has a slightly higher carb count.
- Make it sweet: Add in a natural sweetener like stevia or erythritol if you find the peanut butter a bit bland.
- Note: If you’re used to the store-bought kind with its additives then this switch to an all-natural, homemade peanut butter might surprise you. Your preference for a sugary peanut butter will go away after a bit, though, so don’t give up on it!

Tips and Tricks
- You can roast the peanuts yourself by putting them in the oven for about 10 minutes at 375°F.
- Stir in the sweetener if you choose to use some rather than blending it in.
- Stop the blender often to avoid overheating.
What Can I Make With This Homemade Peanut Butter?
Now that you’ve made your own peanut butter, it’s time to revisit all those baked goods you once made with the store-bought stuff and instantly improve their nutritional value. Here are some KIP-approved recipes for you to try:
Chocolate Peanut Butter Keto Cheesecake Fluff: The ingredients are pretty much right there in the recipe name. It’s served cold so think of it as a healthy alternative to ice cream.
Chocolate Chip Peanut Butter Cup Keto Cookie Bites: Long in name, long in taste! (And no, I’m not sure that made sense.) As you can see, I’m a big fan of chocolate and peanut butter together (as are most people with a decent sense of taste).
Keto Peanut Butter Cup Brownies: One more for the choco-peanut lovers. This one is dairy-free with only 3.5 net carbs. It’s decadent yet diet compliant!
FAQs
You can use sunflower seeds or pumpkin seeds instead of peanuts.
Yes, you can, though the flavor may lack depth.
Reserve about 1/2 cup of your roasted peanuts before processing the rest in the blender. The amount you reserve will depend on how crunchy you want to make it. Once your peanut butter reaches the desired smoothness, add the reserved peanuts to the fully blended peanut butter then pulse the blender briefly to the desired level of smoothness.
It’s up to you. A butter comprising JUST peanuts is delicious but it may not appeal to everyone’s taste buds. My recommendation? Start with a bit of salt then give the blended butter a taste. It’s your peanut butter so make it how you like it.
A powerful blender can make your life a whole lot easier. But a regular food processor or blender will do the job just fine. It might take a bit more time and patience, and you’ll need to pause and scrape down the sides every now and then.

How to Store Homemade Peanut Butter
Store the peanut butter in an airtight container. A secure glass jar, for example, will prevent the butter from drying out and keep odors away. Because there are no preservatives, it’s best to keep your newly minted peanut butter in the fridge where it will last for up to two months. If you like it softer and easier to apply to bread, leave it out at room temperature where it will keep for around two weeks. Oh, and that oil separation is a natural occurrence. Give it a stir before eating to return it to its original creaminess.


Delicious Homemade Peanut Butter Recipe
Ingredients
- 4 cups roasted peanuts
- ¼ tsp salt
Instructions
- Pour the peanuts and the salt into the blender.

- Process the peanuts so that they make a fine crumb. Scrape down the sides of the blender to clear off any peanuts so that the butter is consistently smooth.
- Keep blending and scraping until a smooth peanut butter is produced.
Notes
- You can roast the peanuts yourself by putting them in the oven for about 10 minutes at 375°F.
- If you choose to use a sweetener, stir it in rather than blend it in.
- A powerful blender can make your life a whole lot easier, whipping up your homemade peanut butter faster and smoother. But no stress if you don’t have one. A regular food processor or blender will do the job just fine. It might take a bit more time and patience, and you’ll need to pause and scrape down the sides every now and then. The break will also let your blender relax to avoid over-heating.
Nutrition


Leave a Comment